|
|
|

Those other little buttons…
Texturing Surfaces in Lightwave 3D
Textures are applied via the little "T" buttons in the Surfaces Panel…
So… you know how to load "surface files" and render golf balls… what if you want to make your own surfaces look the way you want? It is often useful to begin by loading a surface file, and then modify it to suit your needs; for this to work for you, you need to have a pretty good idea of what the different features do -> they are explained in detail in the Lightwave Reference Guide, and are also explained in the Lightwave Power Guide. To get started, here are a few tips on using textures effectively…
Those fabulous ![]() buttons…
buttons…
In order to add more complexity and depth to surface appearances, Lightwave offers a wide variety of image and algorithmic texturing features. "Image Maps" are surface textures which you create by applying an image you created in a paint program, video captures, or any other digital image or picture you have laying around (many file formats can be loaded, but "Targa" and "Iff" are Lightwave’s favorites – I also use "jpeg" a lot). "Algorithmic Textures" are surface textures which alter the appearance of a surface without the use of image files; they involve software "algorithms" which adjust the appearance of your surface by adding (or subtracting) colors and shades to the surface you have defined. For more information, see below.
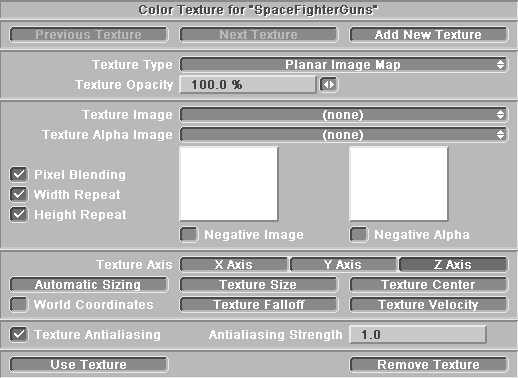
Fig 1. This image shows the Texture Panel for "Color Texture for ‘SpaceFighterGuns’".

We will look into the specific functions of the different fields and gadgets in the panel in the following pages, for now, refer to the figure on the preceding page, and become familiar with the general layout of the panel.
The Texture Panel (General Information)
Please note that the Texture Panel is divided into six or seven parts, from the top down (see image on preceding page):
"Remove Texture" = throw the texture settings I have created away.
We will look at how to apply the different types of map in the following pages; feel free to experiment with applications (and press <f9> for a quick look at what you’ve done). There is no practical limit to the number of texture maps which can be used on a given image, though each additional texture (esp. algorithmic ones) will mean that it takes that much longer for Lightwave to render your image, and textures can be used to achieve almost any imaginable surface appearance or effect.
Bitmapped Textures (or "Image Maps")
This refers to the use of images (ie. bitmaps, pictures, etc.) to give texture to a 3D surface. Images can be applied to 3D objects in many different ways, and can be made to do many different things to the object. For instance, a color image of a soup can label can be wrapped around the can to make it look like a can of soup -> at the same time, a simple black and white (or greyscale) image can be applied to the same can, to make the label area look like it is raised up off of the can ever so slightly, and a noise image or algorithm could then be thrown on to make the whole thing look a little beaten up.
Try a simple example…
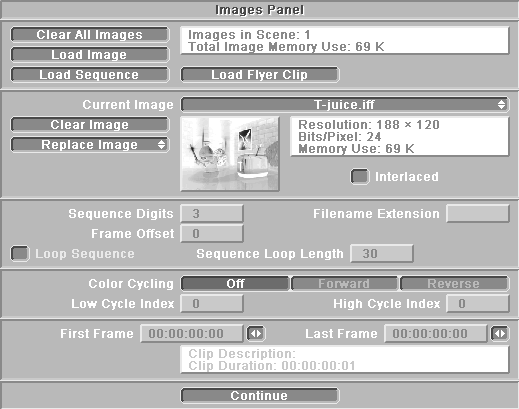
Fig 2. The Images Panel. Note that the loaded image appears in the little preview window.

Fig 3. This is where you select the type of texture you want to apply.
![]()
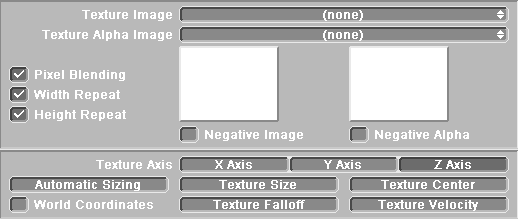
Fig 4. This portion of the panel appears if you select one of the image mapping options from the "Texture Type" selection field near the top of the panel.

That is it! Press <f9> to see how the texture looks on your object.
Image maps can be applied as "planer" maps (projected straight along one axis – on the object’s local x, y, or z) as in the example above. They can also be applied as:
As well as loading many different types of images, the Image Panel also allows you to load a "sequence" – ie. a series of images (such as a captured video sequence) – via the "load sequence" button in the images panel – these are applied exactly as a normal still image map is.
Aside: "Sequence" does NOT mean an animation file (such as an AVI, MOV, or FLC, although these will sometimes work too); "sequence", in this context, means a series of images with names like "file001.tga, file002.tga, file 003.tga, etc. A "sequence" can be applied just like a regular image map, and will "play" through the available source frames once before stopping -> there is an option in the surface panel marked "Loop Sequence" which will cause it to loop, and another marked "Frame Offset" where a positive frame offset of "10" will cause the sequence to start "playing" its tenth frame in frame 1 of the animation, and a negative frame offset of "-10" will cause it to start playing frame one of the sequence in the tenth frame of the animation.
Different Texture![]() s
s
The preceding example used a "color" texture, which has the most obvious function. A color map applies the colors (up to 24 bits) of the image directly to the surface, whereas a diffusion map, transparency map, specularity map, etc. uses the "luminosity" values found in the color map to alter the diffusion, transparency, specularity etc. of the object’s surface (ie. only 8 bits); thus a "greyscale" (256 color, 8 bit image) version of the bitmap is normally used instead of an actual color map for those image mapping. Commonly, full color image maps are used only for actual "color" mapping. {There is absolutely no reason why a color or greyscale image may not be used for any type of image mapping, but if you only need 256 colors (as in the case of bump mapping, which only uses 256 shades of gray) then you don’t want to load the additional 16 bits for nothing!}.
SO:these…are used for these…
24 bit imagescolor maps
8 bit imagesdiffusion maps, specular maps, reflection maps,
transparency maps, bump maps, clip maps (object panel), and displacement maps (objects panel)
For an explanation of the different types of surfacing characteristics (ie. diffusion, transparency, etc.) see the handout "Surfacing", or refer to the Lightwave Reference Guide or Lightwave Power Guide.
Algorithmic textures
This refers to texture effects which are not dependent on "bitmaps" – ie. textures which can be made to appear on the surface of an object because of an "algorithm" or mathematical function supplied by the software manufacturer or a third-party developer. Why are these used? One reason is that since they do not require you to load a bitmap (image) into memory, more RAM is available when you render than would be available if you used a bitmap; moreover, they take up very little hard drive space. As well, they allow you to create surfaces with ease, without needing to use a paint program. Another advantage is that they appear to repeat random into infinity – ie. that they can be applied to a very large surface, and no "tiling" effect occurs. These may be applied as any type of texture (ie. bump, color etc.) although some algorithms are only available for certain types of application (ie. fractal bumps can only be applied as a bump map).
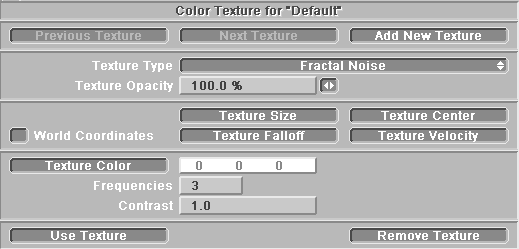
Fig 5. This is the way the panel will appear if you select "Fractal Noise" as a texture type. Other algorithmic textures (ie. checks, fractal bumps, fractal noise, underwater, wood, marble, etc.) will reveal similar panels.

Each individual algorithmic texture has its own settings, and these are too many to quote in this small space, but suffice it to say that they offer enormous control over appearances -> experiment! RTFM.
It is generally the case that all textures in Lightwave, both (algorithmic textures and image maps), offer the following features:
"Texture Size": This is the size of the texture in meters, or in the case of some algorithmic textures, the size of the average detail, or the size of the space between grid lines, etc.
"Texture Center": Simply put, this is the center of the texture -> very important in some algorithmic textures.
"Texture Falloff": This enables the diminishing of the texture value over distance. The value you enter represents how much of the texture’s opacity is lost for each meter traveled outward from the center of the texture.
"Texture Velocity": The direction and speed of travel of the texture across the surface. (Usually = 0). This is good for flames, clouds, waves, etc. where you want the texture to appear to move across the surface.
c. 1997, 1998 Tony Gilchrist